

How to Print High-Quality Backlit Graphics with a UV Roll-to-Roll Printer
Backlit signs turn a printed image into an illuminated visual display. From retail lightboxes and airport advertising to exhibition graphics and indoor wayfinding, the final result depends on more than image resolution. Film transparency, ink density, lighting, and the print layer structure must work together. This guide explains a practical workflow for producing vivid, consistent backlit graphics with a UV roll-to-roll printer.
What Is UV Backlit Printing?
UV backlit printing applies UV-curable inks to a translucent or transparent film intended to be viewed with light behind it. UV lamps cure the ink during printing, making the process suitable for many compatible signage films. The aim is to achieve detail, legibility, and predictable color in the actual lightbox—not simply on the print table.
Common applications include retail LED lightboxes, transit advertising, trade-show displays, illuminated menus, brand wall graphics, and promotional signage.
1. Choose the Right Film for Your Lightbox
Media selection should start with the lighting system and installation requirements. Not every “backlit” film has the same diffusion, ink receptivity, or dimensional stability.
Before production, obtain the media supplier’s UV-ink guidance and run a small adhesion and curing test. Confirm the film is suitable for the lamp power, winding tension, and intended environment.
2. Design for Both Reflected and Transmitted Light
A backlit print can appear balanced on a workbench but washed out under LEDs. Conversely, adding too much ink to compensate for illumination may make the graphic look dark when the lightbox is off. Create artwork at final output size, use high-quality source images, and preserve readable type and contrast. Evaluate proofs under the actual LED color temperature and brightness when possible.
3. Understand Ink Density and White-Ink Layers
Standard illuminated graphics
For a conventional backlit film, suitable media diffusion and a calibrated color profile may provide the required result without a white-ink layer. Depending on the substrate, a higher-density or backlit-specific print mode may be useful, but excessive ink can reduce clarity, compromise curing, or affect adhesion.
Day-and-night graphics
For a graphic that must look appealing with the backlight both on and off, a color–white–color (C–W–C) construction is one established approach. The intermediate white layer helps manage reflected versus transmitted light. Its effectiveness depends on media type, white opacity, color separation, RIP settings, and available printer layer-printing capabilities. Do not assume every UV printer supports this workflow.
For reverse printing on clear film, image orientation and layer order must be verified in the RIP and tested on a sample. Print-layer instructions differ between front-surface and second-surface viewing.
4. Build a Reliable UV Printing Workflow
· Confirm the film specification and the lightbox dimensions; note which side will face the viewer.
· Prepare artwork at final size; review image resolution, fonts, small text, gradients, and bleed.
· Select the correct media profile and UV-curing settings; use a compatible backlit mode if available.
· If white ink or multi-layer printing is required, confirm channel availability, RIP support, layer order, and mirror orientation.
· Print a small swatch with skin tones, brand colors, neutral grays, rich blacks, and fine lines.
· Inspect with the LED backlight on and off; adjust density or profile only after comparing both states.
· Check curing, adhesion, scratch resistance, winding, and finishing before moving to full production.
5. Improve Color Accuracy and Uniform Lighting
Color profiling matters because illuminated media changes perceived contrast and saturation. Use an ICC profile matched to the printer, ink, media, and print mode. Avoid treating higher saturation or maximum ink limit as a universal fix: higher deposition can affect drying/curing behavior, detail, and operating cost. Uniform LED spacing, diffuser design, and clean lightbox panels are equally important. A band-free print cannot compensate for uneven lighting behind it.
6. Solve Common Backlit Printing Problems
7. How to Choose a UV Roll-to-Roll Printer for Backlit Signage
A good purchasing decision starts with production width, expected monthly volume, supported roll media, color requirements, white-ink capability, RIP workflow, and local service. For large-format signage, compare total usable media width and throughput at a quality mode suitable for backlit graphics—not only headline maximum speed.
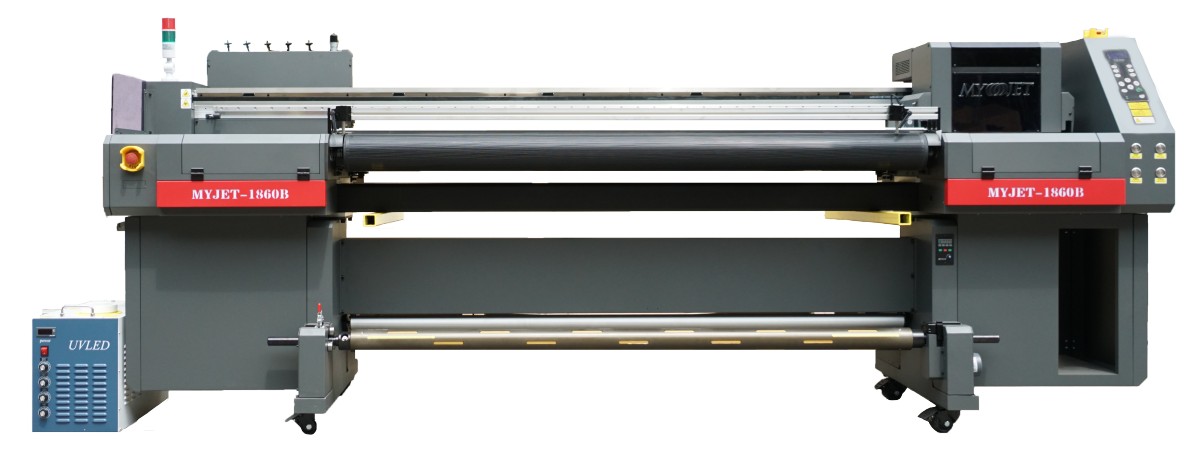
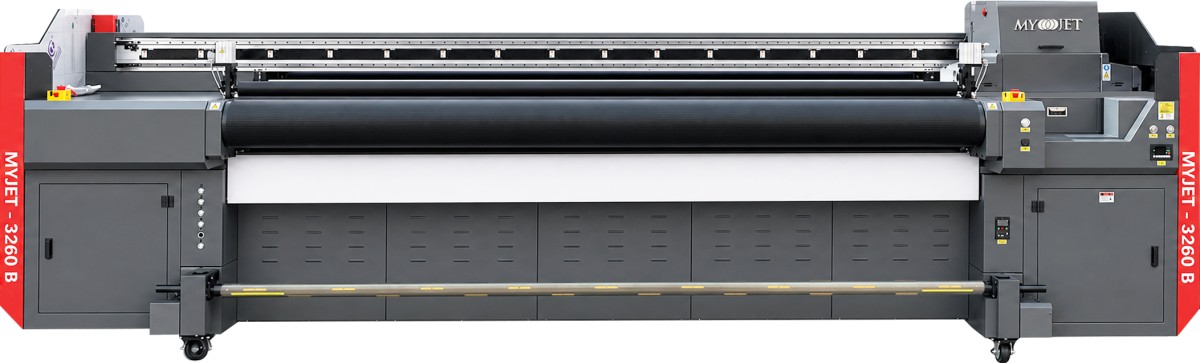
MYJET offers UV roll-to-roll solutions for sign and display applications, including the 1.8 m-class MJT 1860B and wider 3.2 m-class solutions such as the 3260B. Configuration and printing capabilities may differ by version. Ask the MYJET team to confirm the available ink channels, RIP layer modes, compatible film types, and a sample print for your application before purchasing.
Frequently Asked Questions
Can a UV roll-to-roll printer print backlit film?
Yes, provided the printer, UV ink, and film are compatible. Test curing, adhesion, color, and roll handling on the exact material.
Do all backlit graphics need white ink?
No. Standard diffusing backlit film may work with a suitable color-only print mode. White ink is useful for selected transparent-film and day/night constructions.
What is color–white–color printing?
It is a multilayer arrangement with a white layer between two color images to balance the printed appearance under reflected and transmitted light. The RIP and printer must support the required workflow.
Why does my lightbox print look washed out?
Common reasons include unsuitable ink density, media transmission, incorrect profiling, or overly strong lighting. Check an illuminated proof before increasing ink.
Which is better for lightboxes: UV printing or eco-solvent printing?
Both can produce attractive backlit graphics when paired with suitable media and profiles. Consider material range, finishing, production speed, durability requirements, printer maintenance, and total cost rather than assuming one process always wins.
Conclusion
Professional UV backlit printing is a system: choose compatible media, match ink density to illumination, validate any white-ink layer structure, and test the finished display under real lighting. For sign makers and print service providers, a repeatable proofing workflow is the fastest way to reduce reprints and improve consistency. Contact MYJET to discuss your planned lightbox sizes, film samples, and suitable UV roll-to-roll printer configuration.
GET IN TOUCH